Many people have evening snacks as a regular habit, but what they don’t realise is that choosing healthy evening snacks can lead to better sleep while keeping you within your health and wellness goals.
The problem isn’t snacking in the evening or at night; it’s the type of food and portion sizes which play a crucial role. Smart low-calorie evening snacks around 150 calories are very good to stabilise blood sugar overnight and improve sleep quality by providing essential nutrients.
This will help you with perfect evening snacks suited to your cooking styles and lifestyles, and identify the best snacks for better sleep.
Why Evening Snacking Gets a Bad Reputation
Evening snacking gets blamed for weight gain, poor sleep, and indigestion, but timing isn’t the villain, it is what people choose to eat.
People eat chips while watching their favourite web series, while consuming over 500 calories without even realising it, which leads to uncomfortable fullness, disrupted sleep and groggy mornings.
However, healthy night snacks can actually improve sleep by stabilising blood sugar and providing magnesium and tryptophan nutrients that promote better sleep and rest, meaning you won’t wake up hungry at 3 AM.
The Science of Nighttime Hunger
Ghrelin (the hunger hormone) typically peaks in the evening and leptin (the fullness hormone) follows its own cycle throughout the day, which explains why you feel hungrier before dinner than after lunch, even with similar meal sizes.
If you had an early or light dinner, your body might signal for something small before bedtime, that negatively affect sleep as blood sugar levels drop overnight. The goal? Finding bedtime snacks that satisfy without weighing you down.
The 150-Calorie Sweet Spot
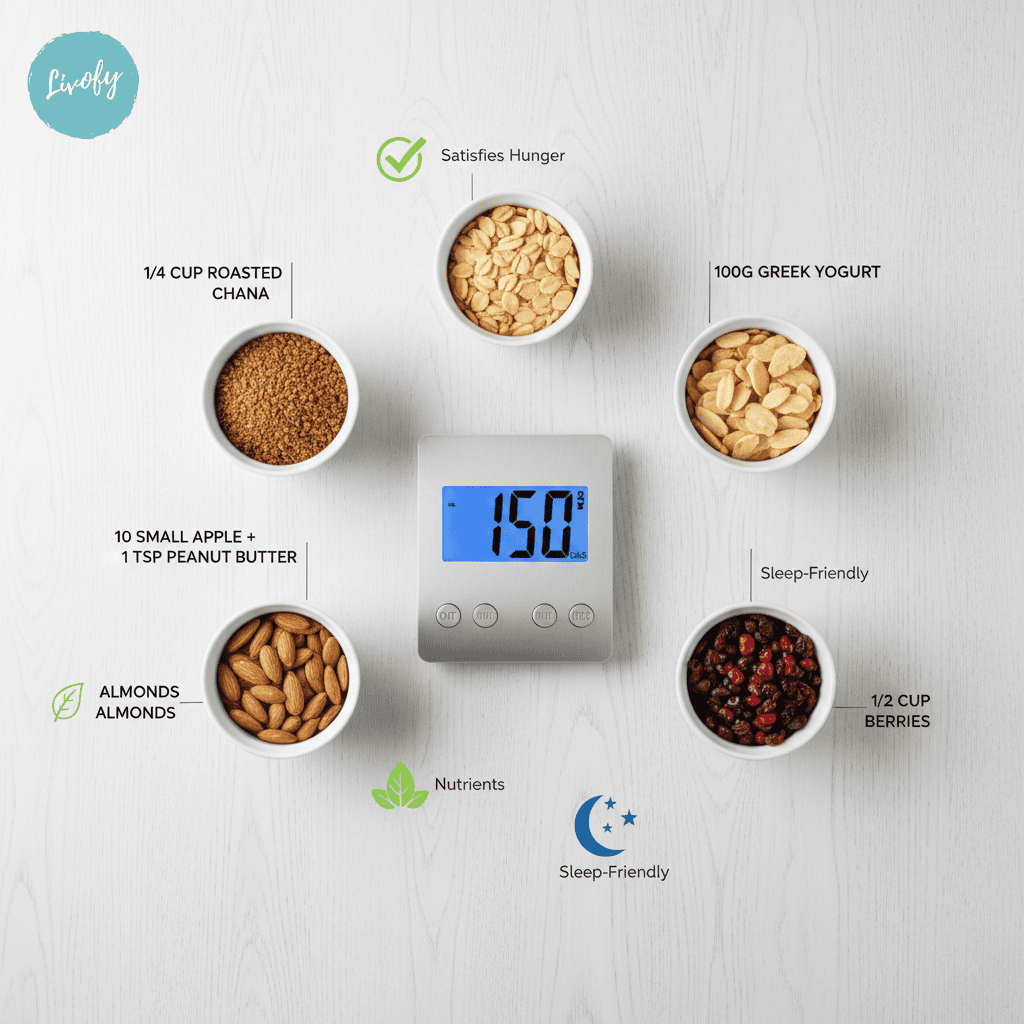
150 calories specifically because this amount satisfies hunger and delivers nutrients without pressuring your digestive system before sleep, which is good enough to matter but won’t derail your daily calorie goals.
When you choose a nutrient-rich snack under 150 calories, that can be surprisingly filling while focusing on foods with protein, fibre, or healthy fats which keep you satisfied and support overnight recovery.
25 Indian Evening Snacks Under 150 Calories
Let’s get practical with low-calorie bedtime snacks you can make with ingredients from Indian kitchens.
Protein-Packed Options
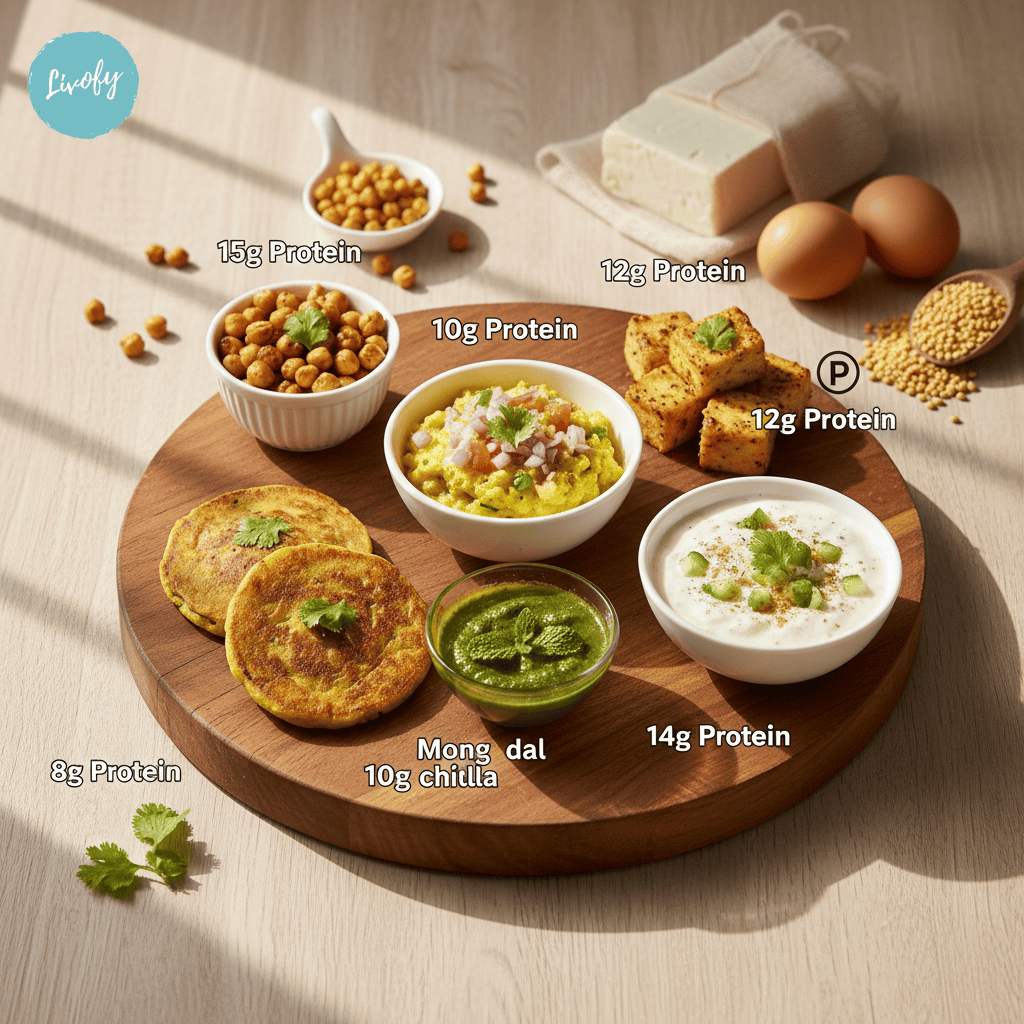
Roasted Chana (1/4 cup, 140 calories): The classic choice! Roasted chickpeas offer crunch, protein, and fibre. Add lemon and chaat masala for extra flavour.
Paneer Cubes with Black Pepper (50g, 130 calories): Cut paneer into cubes, sprinkle with black pepper and rock salt. The protein keeps you full while calcium promotes better sleep.
Boiled Egg White Chaat (2 egg whites, 35 calories): Chop boiled egg whites, add onions, tomatoes, green chilli, and chaat masala. Super filling for minimal calories.
Moong Dal Chilla Mini (1 small, 120 calories): Make a thin chilla with moong dal batter and grated vegetables like a protein-packed pancake.
Hung Curd with Cucumber (100g curd, 90 calories): Mix hung curd with grated cucumber, fresh mint, and black salt.
Fibre-Rich Choices
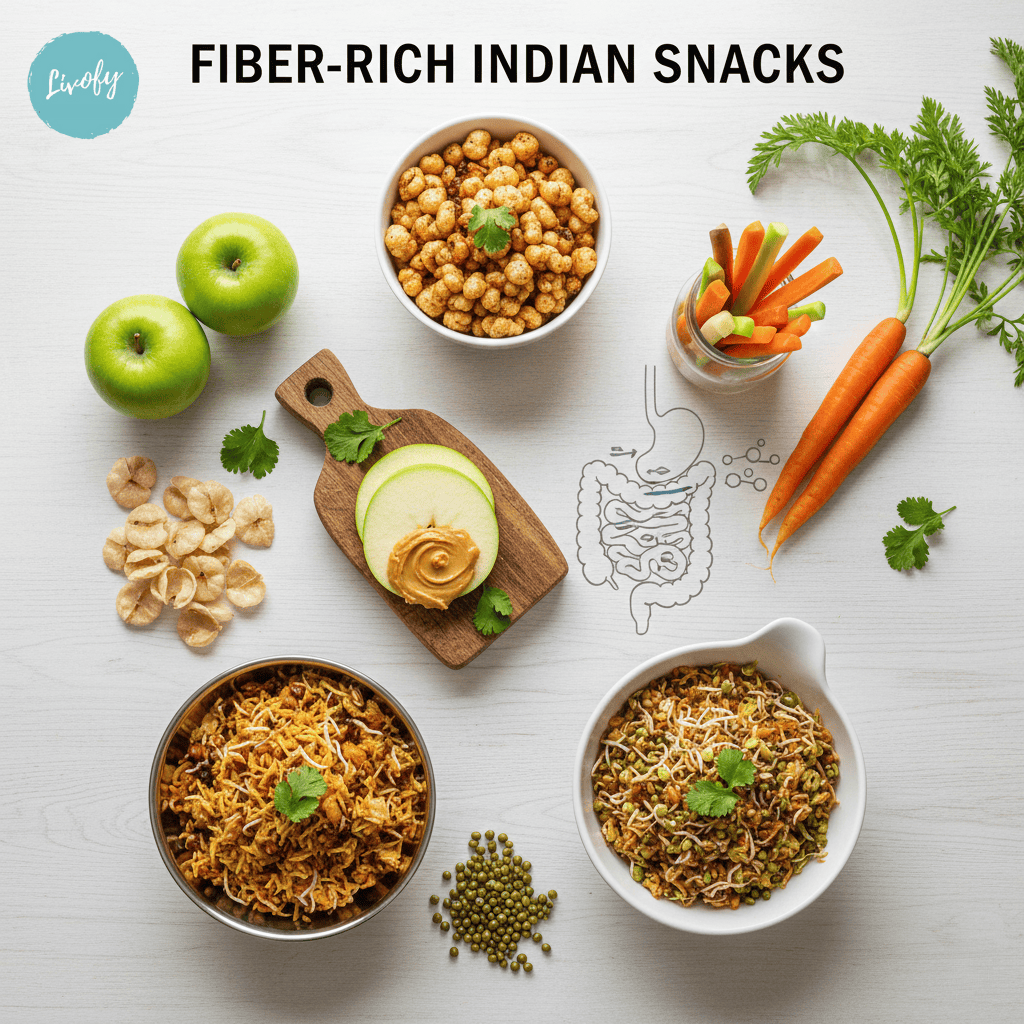
Makhana/Fox Nuts (1 cup roasted, 100 calories): Roast makhana with minimal oil, sprinkle with black salt and pepper. Crunchy like popcorn but way more nutritious.
Carrot Sticks with Hummus (1 medium carrot + 2 tbsp hummus, 140 calories): The crunch of carrots with creamy hummus delivers fibre and plant protein in one snack.
Apple Slices with Peanut Butter (1 small apple + 1 tsp PB, 145 calories): Classic combo offering fibre, healthy fats, and natural sweetness to curb dessert cravings.
Bhel without Sev (1 small bowl, 130 calories): Make bhel with puffed rice, lots of veggies, and chutneys. Skip the sev to save calories while keeping the taste.
Sprouts Chaat (1/2 cup, 100 calories): Mixed sprouts with onions, tomatoes, lemon juice, and spices. Incredibly filling with complete plant protein.
Sleep-Promoting Snacks

Warm Milk with Nutmeg (150ml low-fat milk, 120 calories): Tryptophan in milk promotes sleep, and nutmeg has mild sedative properties. This Ayurvedic remedy for snacks that help you sleep actually works.
Banana with Almonds (1/2 banana + 5 almonds, 140 calories): Bananas provide magnesium and potassium that relax muscles. Almonds supply natural melatonin.
Cherry Tomatoes with Cottage Cheese (10 tomatoes + 30g cottage cheese, 130 calories): This combo delivers tryptophan and complex carbs that promote serotonin production.
Chamomile Tea with Dates (2 dates, 140 calories): Chamomile naturally relaxes you while dates provide natural sweetness and fibre.
Greek Yoghurt with Cinnamon (100g, 100 calories): Plain yoghurt with cinnamon stabilises blood sugar overnight while providing sleep-promoting calcium.
Quick and Easy Options
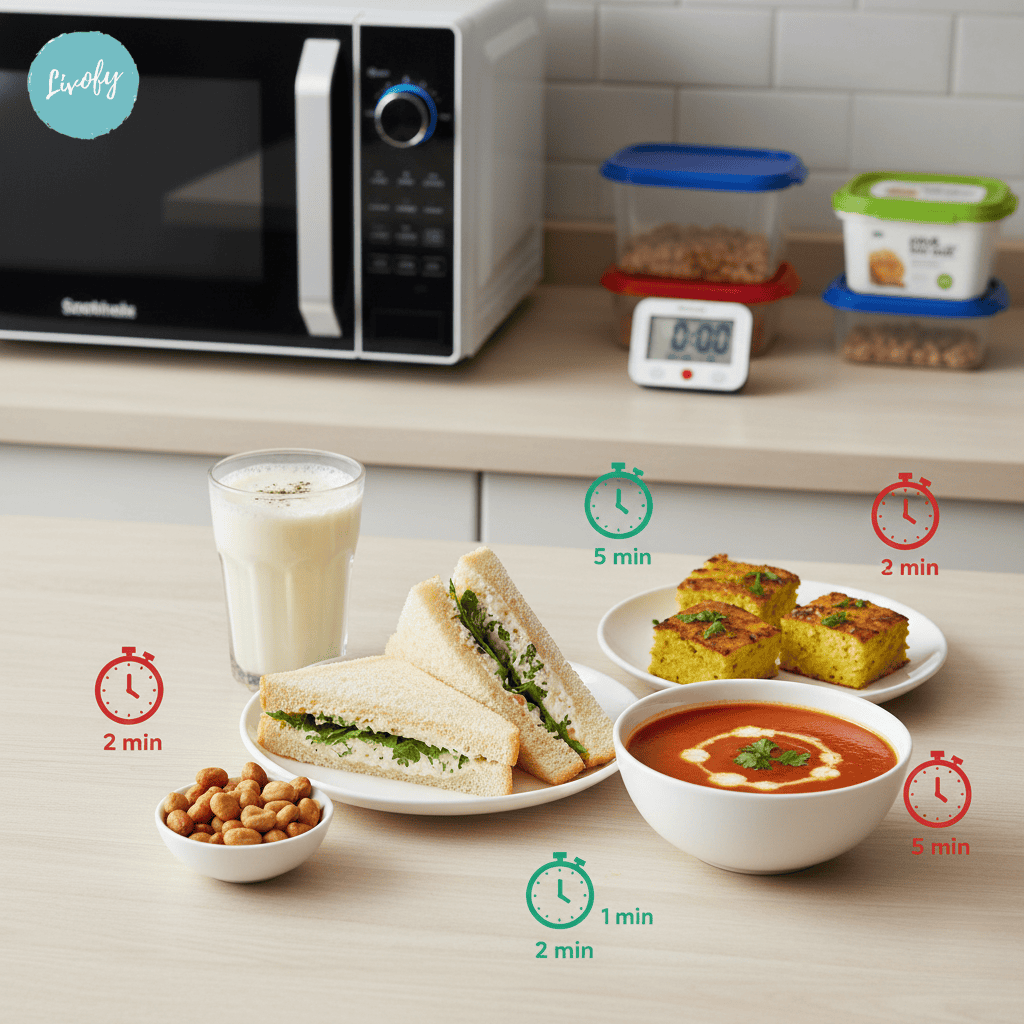
Cucumber Sandwich (2 thin slices of bread + cucumber, 140 calories): Use whole-grain bread, lots of cucumber, and refreshing mint chutney.
Masala Buttermilk (1 glass, 40 calories): Blend yoghurt with water, add roasted cumin, black salt, and mint. Super low-calorie but satisfying.
Roasted Peanuts (20g, 115 calories): Simple and portable. The healthy fats and protein keep you satisfied through the night.
Dhokla (2 small pieces, 120 calories): Steamed and fermented, naturally light. The fermentation aids digestion before sleep.
Tomato Soup (1 bowl, 90 calories): Homemade tomato soup with herbs fills you up with minimal calories. Add black pepper for extra flavour.
Sweet Tooth Satisfiers

Dark Chocolate Square (10g, 55 calories): One square of 70% dark chocolate satisfies sweet cravings while providing antioxidants.
Frozen Grapes (1 cup, 100 calories): Nature’s candy! They taste like tiny sorbets and take longer to eat, increasing satisfaction.
Baked Apple with Cinnamon (1 medium, 95 calories): Core an apple, stuff it with cinnamon and a tiny bit of jaggery, then bake. Tastes like dessert.
Dates with Coconut (2 dates + 1 tsp coconut, 145 calories): Stuff dates with coconut for a naturally sweet treat with fibre and healthy fats.
Homemade Fruit Popsicle (1 medium, 60 calories): Blend watermelon or orange juice, freeze in molds. Refreshing and naturally sweet.
The Right Way to Snack in the Evening
Having the right weight loss evening snacks is only half the battle. How you eat them matters too.
Timing Is Everything
Ideal timing for low calorie evening snacks? 2-3 hours after dinner and at least 1 hour before bed.
If you have dinner at 7 PM, aim for a snack around 9-9:30 PM if you’re genuinely hungry. Going to bed at 11 PM gives your body enough time to digest. Eating too close to bedtime disrupts sleep quality.
Pay attention to your hunger cues, though not everyone needs evening snacks. If you’re satisfied after dinner and sleep well, there’s no need to add extra calories.
Mindful Munching Strategies
The biggest problem with evening snacking? Mindless eating.
Sitting in front of the TV with a bag of chips is a recipe for disaster. Instead, practice mindful snacking.
Portion out your snack before eating. Put exactly what you’ll eat on a plate, then store the package away. This prevents the “just one more handful” trap that turns 150 calories into 500.
Eat without distractions. Put down your phone, turn off the TV at least for those few minutes. When you pay attention to what you’re eating, you feel more satisfied with less.
Creating a Snacking Routine
Having a routine helps prevent impulsive choices.
Prep your healthy evening snacks during meal prep. Cut vegetables, portion out nuts, or make roasted makhana on Sunday for the whole week.
Keep healthy options visible and junk food hidden. When you open the fridge, you should see cut fruits and veggies, not leftover cake. Make the healthy choice the easy choice.
Designate a snacking area, preferably not in front of the TV or in bed. This helps your brain associate that space with controlled eating rather than endless grazing.
Foods to Avoid Before Bed
While we’re discussing smart bedtime snacks, let’s talk about what to avoid.
Heavy and Greasy Offenders

Samosas, pakoras, and other fried foods might be tempting, but they’re terrible choices. The high-fat content takes forever to digest. Plus, one samosa easily packs 200+ calories.
Pizza, burgers, fast food? These aren’t just calorie bombs; they can cause acid reflux when you lie down. That burning chest sensation isn’t worth it.
Creamy desserts like ice cream or kheer seem comforting, but the sugar-fat combo seriously disrupts sleep. The sugar spike followed by a crash can literally wake you up at 3 AM.
Sugar Bombs and Sleep Disruptors
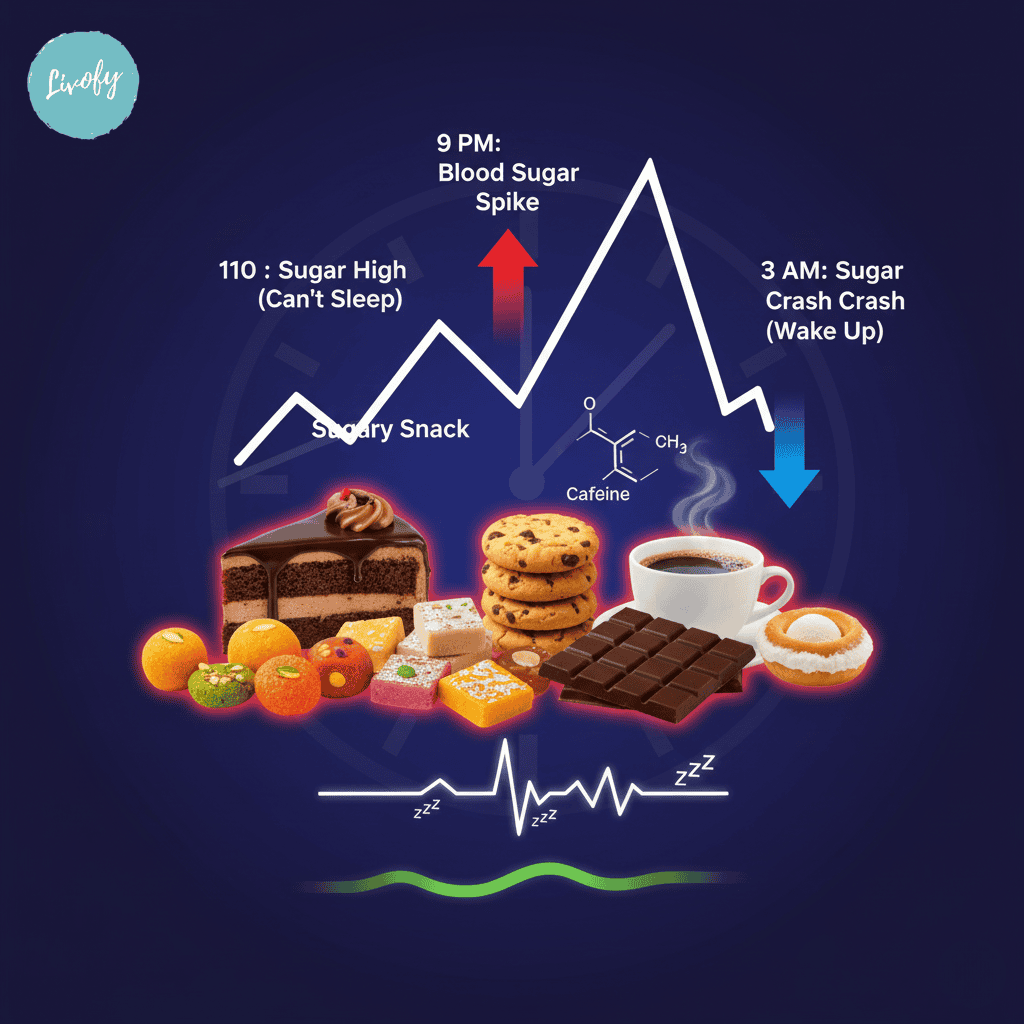
Cookies, cakes, and mithai are all loaded with sugar that spikes blood glucose right before bed. This makes falling asleep difficult, and the crash might wake you mid-sleep.
Caffeinated foods? Even small amounts can mess with sleep, especially if you’re sensitive. Skip chocolate desserts or coffee-flavoured treats in the evening.
Super spicy snacks might be low-calorie, but they can cause heartburn when you lie down. That extra-spicy bhujia could keep you up all night.
How Evening Snacks Affect Your Sleep
Understanding this connection helps you make better choices with snacks for better sleep.
Blood Sugar Balance Through the Night

When you eat snacks with protein, healthy fats, or complex carbs, you maintain stable blood sugar overnight. This prevents those 3 AM wake-ups from blood sugar drops.
Low glycemic foods release energy gradually, keeping you satisfied until morning. This is why a handful of nuts works better than a cookie.
Sugary snacks cause rapid spikes and crashes. Your body might wake you up when glucose drops too low, completely disrupting your sleep cycle.
Nutrients That Promote Better Sleep
Certain nutrients in snacks that help you sleep actively improve sleep quality.
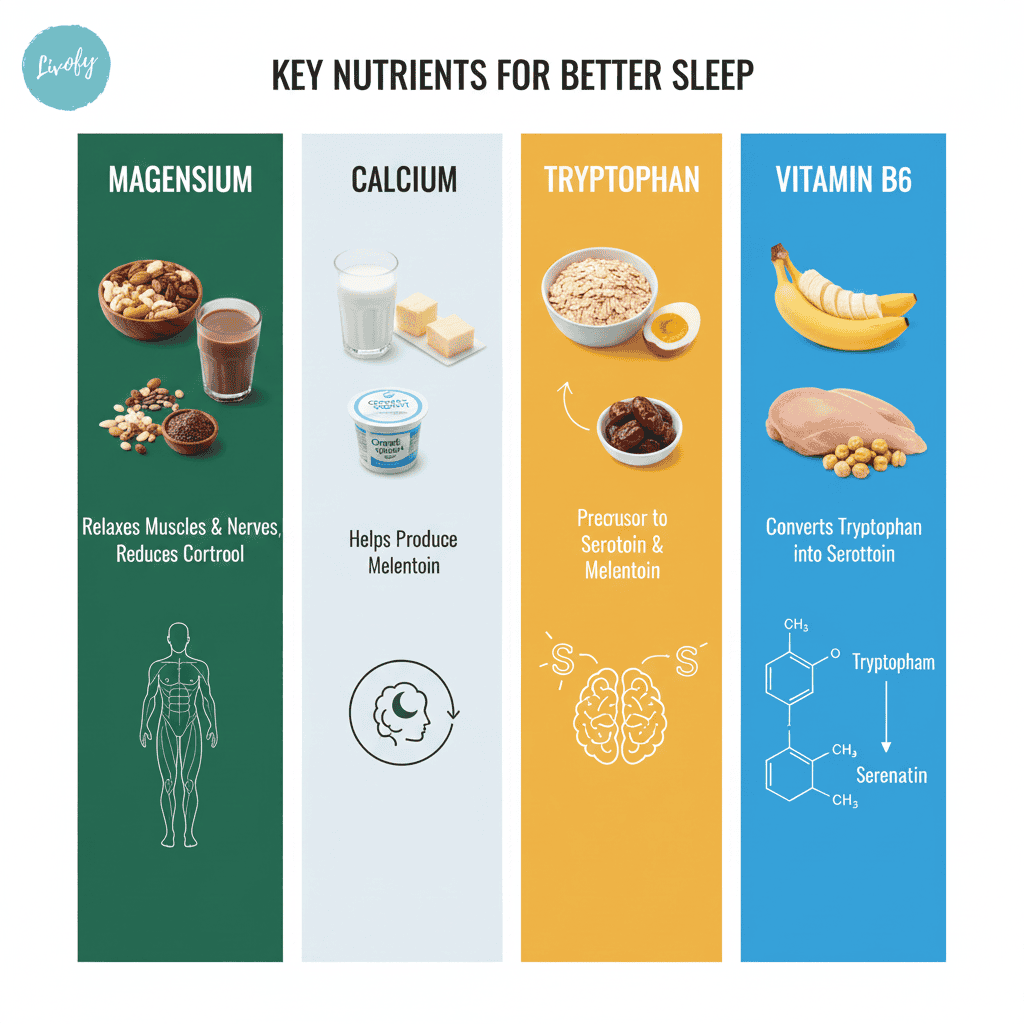
Magnesium (found in nuts and seeds) relaxes muscles and calms the nervous system. Calcium from dairy helps the brain use tryptophan to make melatonin.
Tryptophan (in milk, eggs, nuts) is a precursor to serotonin and melatonin hormones that regulate sleep-wake cycles. Complex carbs help tryptophan reach the brain more effectively.
B vitamins, particularly B6 (in bananas and chickpeas), help convert tryptophan into serotonin. This is why a banana with almond butter makes such an effective evening snack.
Your 7-Day Evening Snack Plan
Here’s a week to get you started. Each option stays under 150 calories.
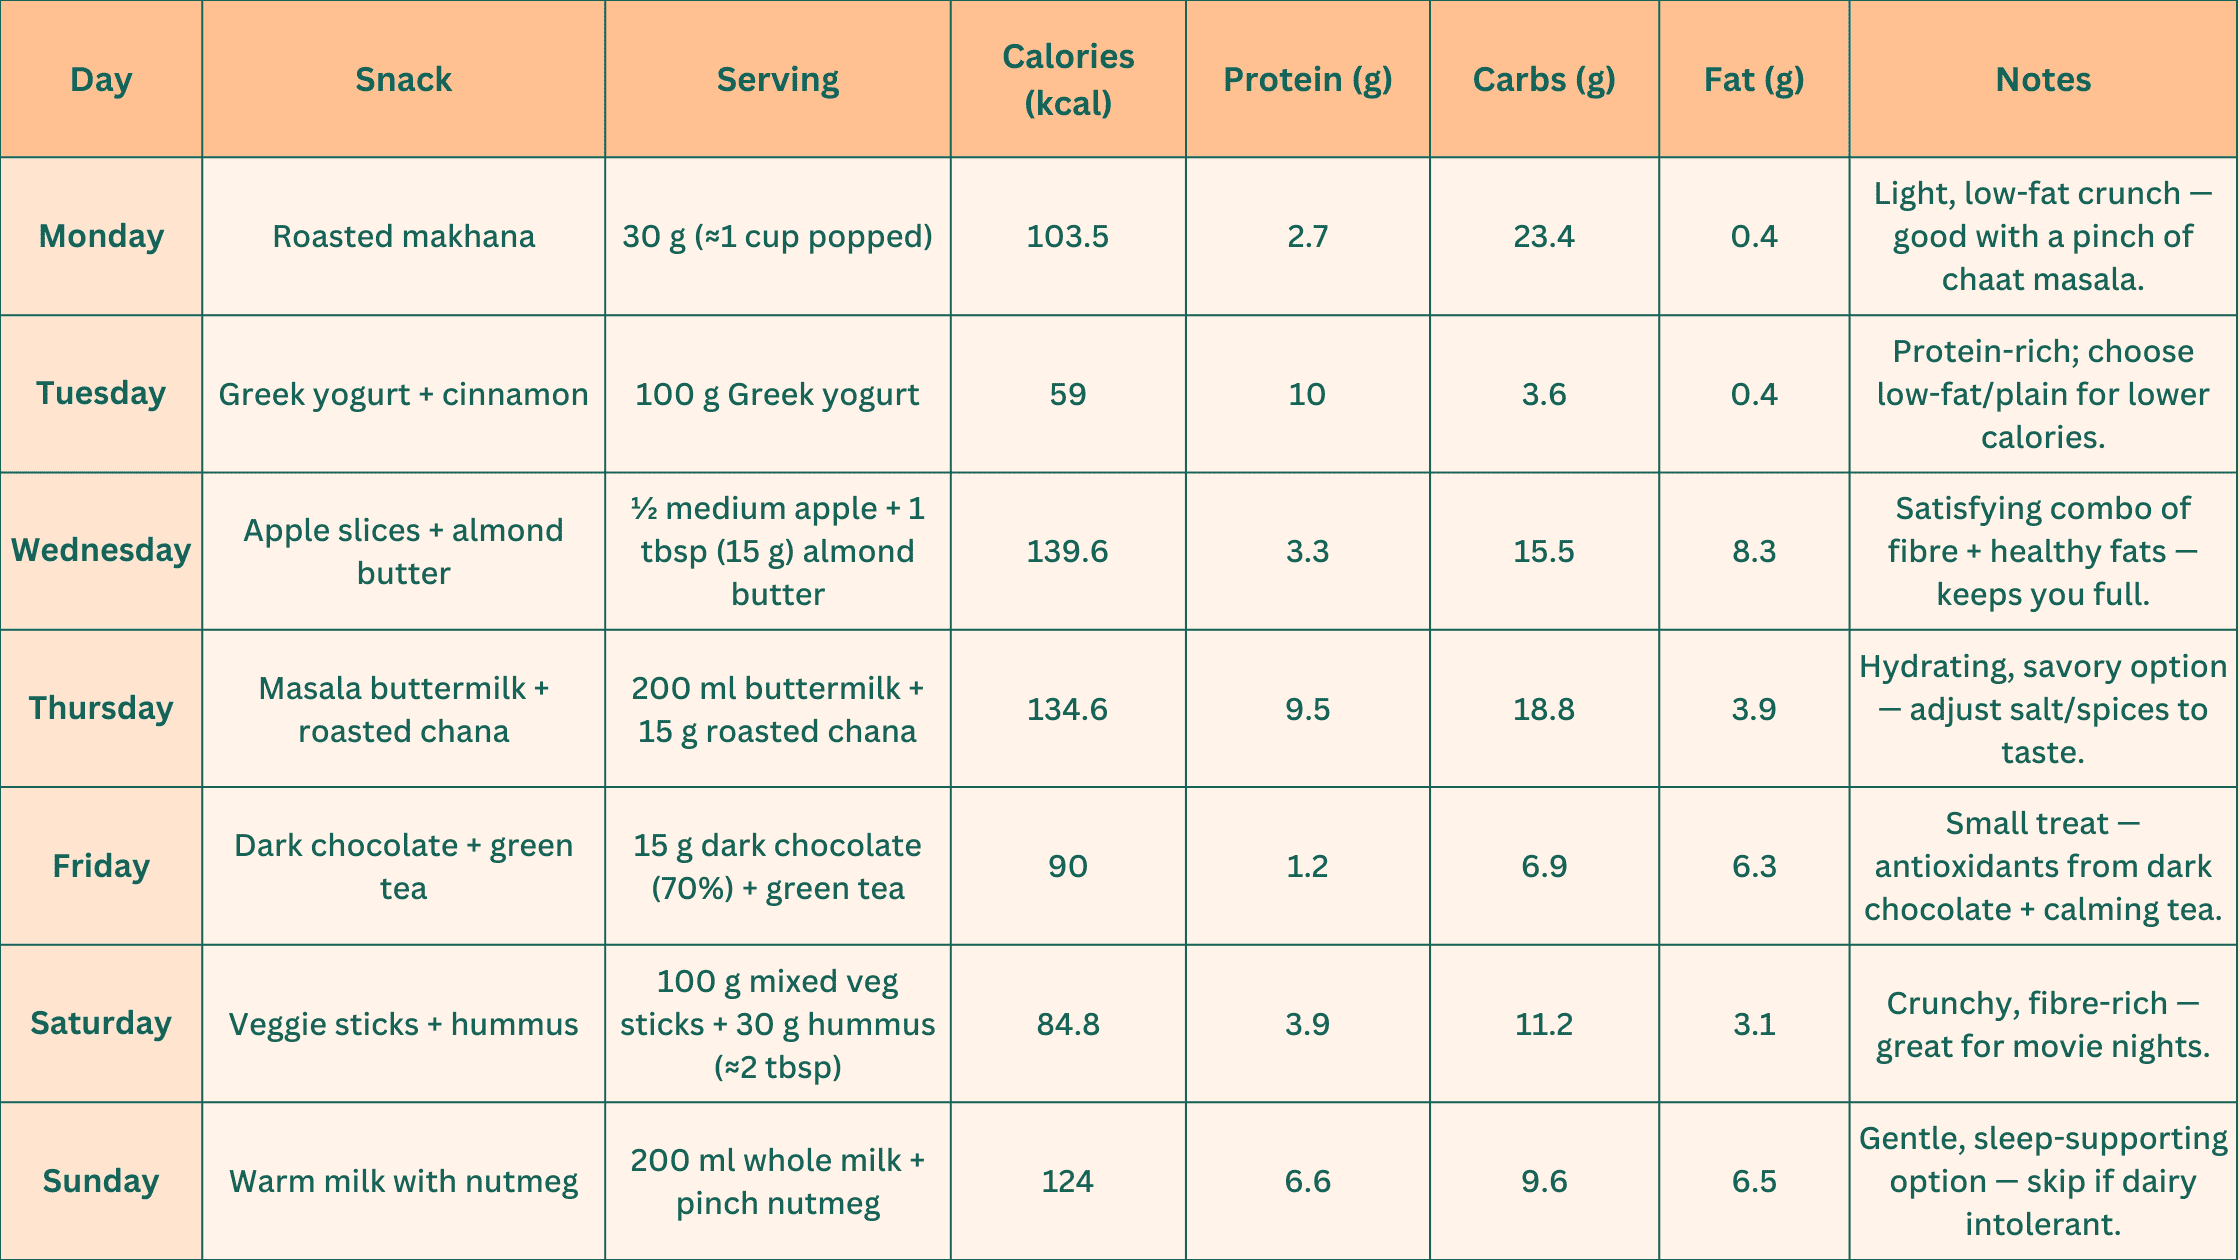
These are just suggestions. Choose based on your hunger, cravings, and what you have available.
Conclusion
Evening snacks don’t have to sabotage your goals. Strategic low-calorie bedtime snacks under 150 calories can support weight loss, stabilise blood sugar, and promote better sleep. The key is selecting nutrient-dense Indian evening snacks that satisfy without overwhelming your system.
Remember, progress beats perfection. If you’re used to 500+ calories in evening snacks, cutting to 150 is huge. Start where you are, make gradual changes, and be patient with yourself.
Listen to your body’s real hunger signals rather than eating by habit or clock. Some nights you won’t need snacks at all. Other nights you might need more. That’s okay. Flexibility and self-awareness matter more than rigid rules when building sustainable habits for long-term health.
Related Posts